The payment verification provides protection of payment data and transaction authentication.
MyTracker can send a request for each tracked transaction to App Store and Google Play servers, you just need to add a key for payment verification — credentials. After adding credentials, you can build reports and view stats on both real payments and unverified purchases.
You can verify in-app payments and subscriptions from the app published on App Store and Google Play. Other stores are currently under development.
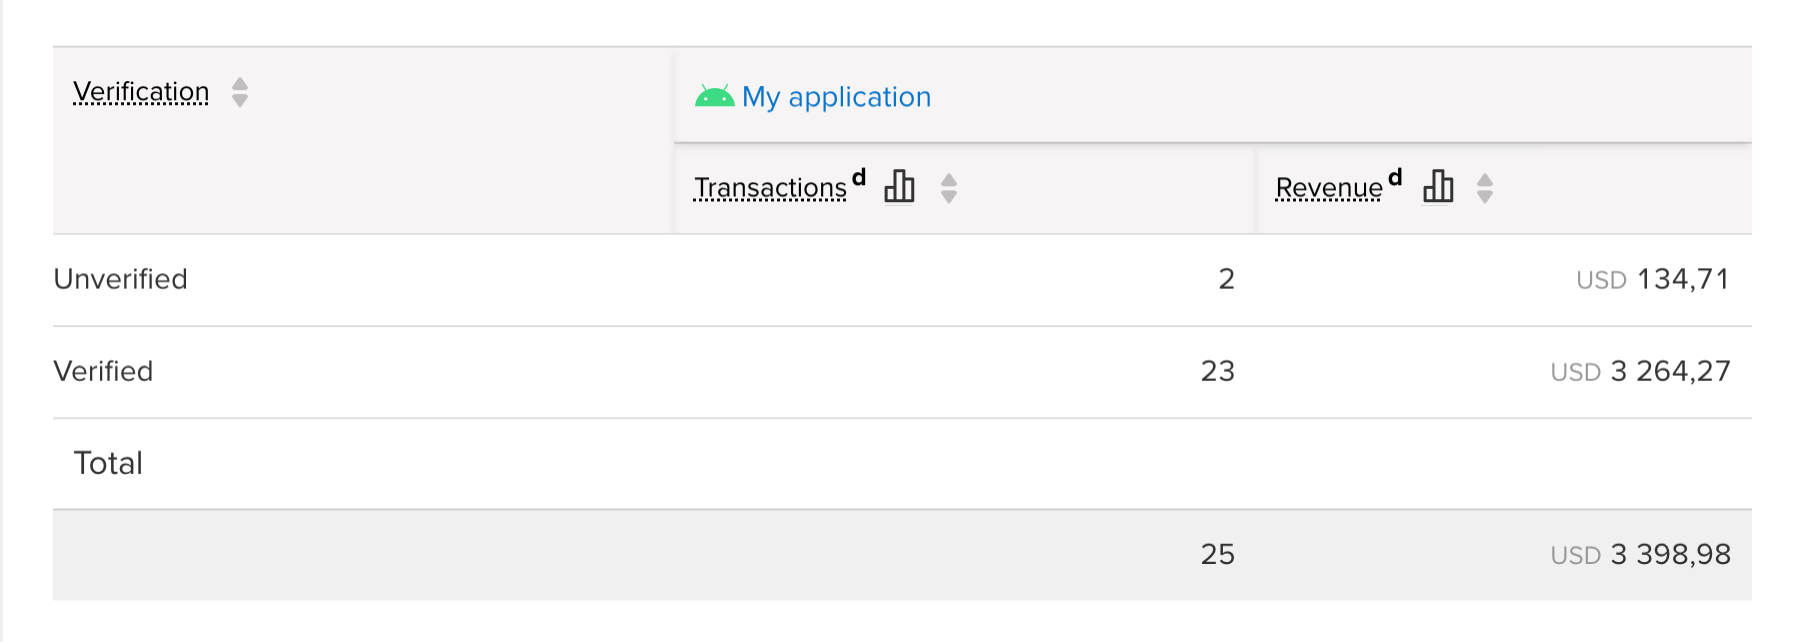
To build a report on verified payments with the Builder ,use the Financial dimensions → Verification metric and the Other filters → Financial metrics → Verification filter
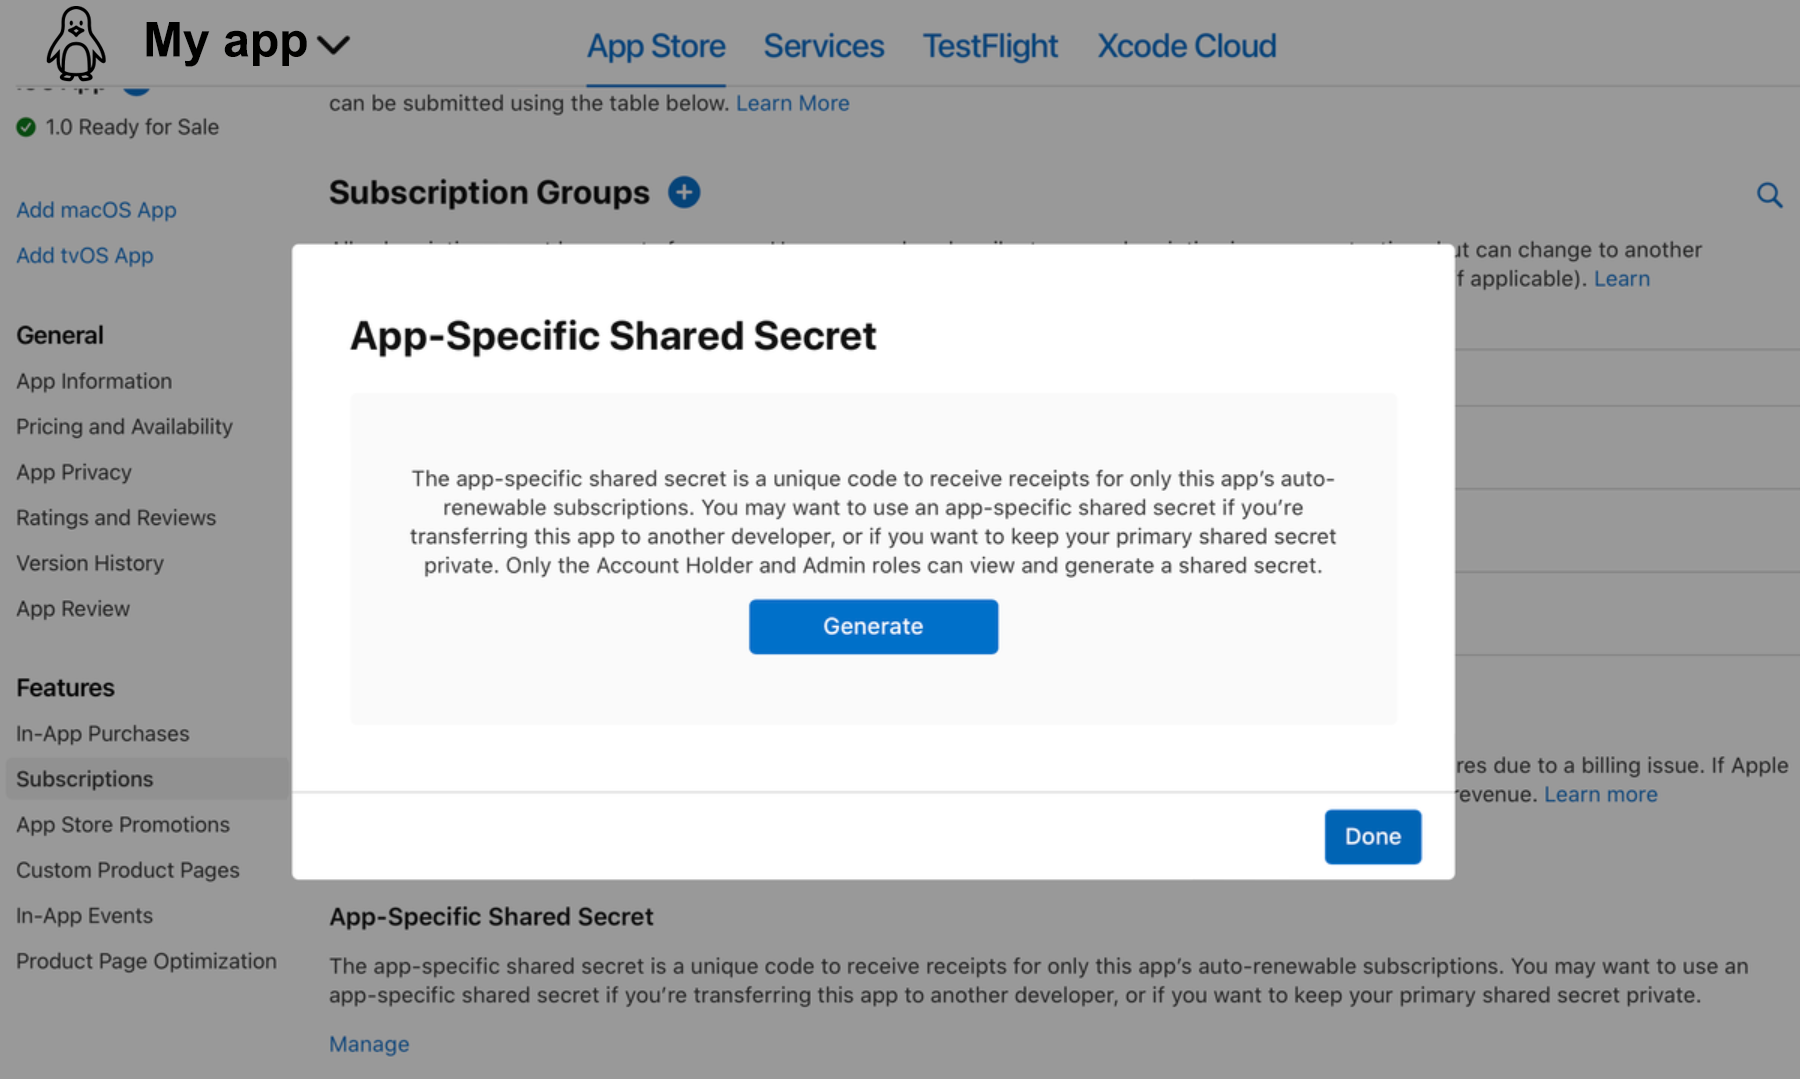
To get App Store credentials:
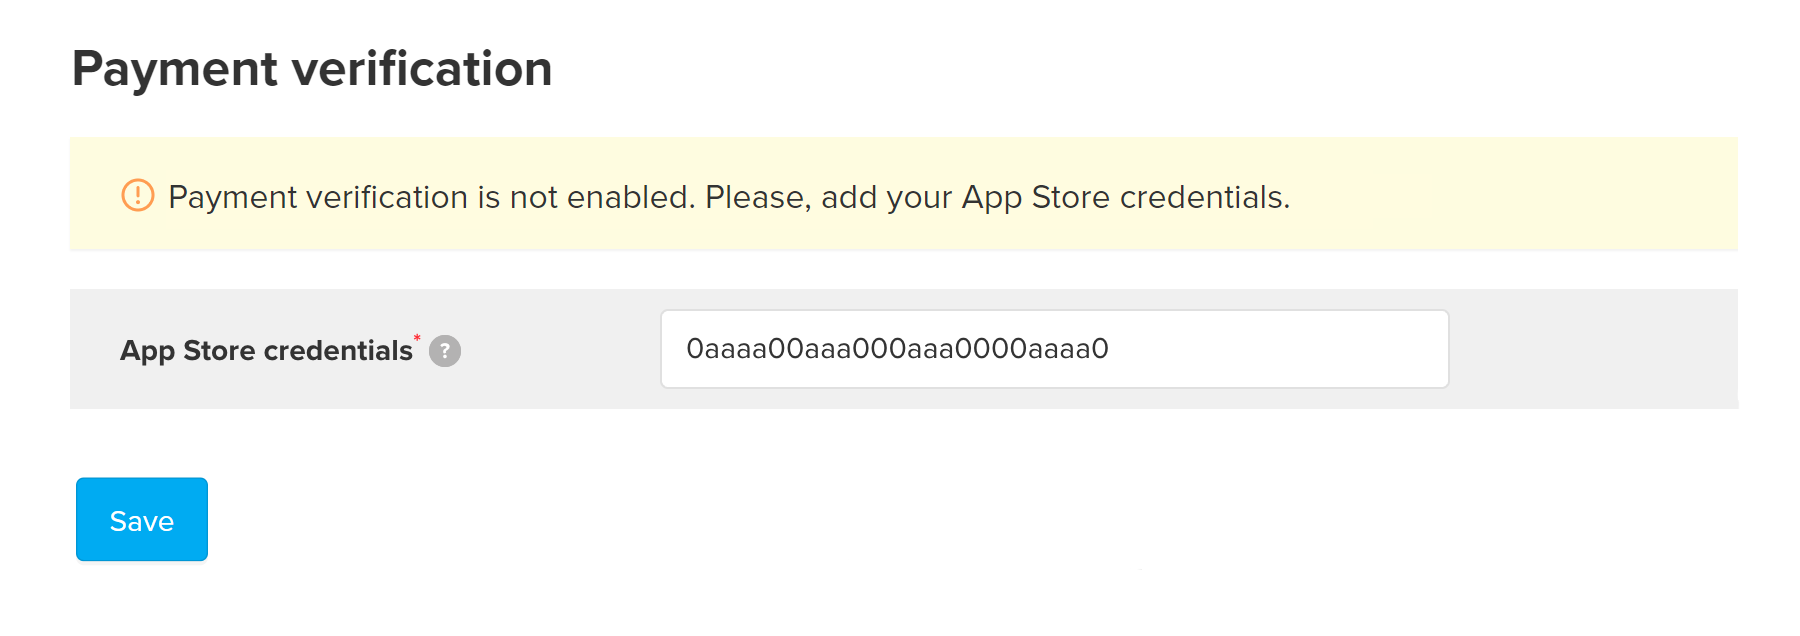
Use credentials to configure payment verification in MyTracker.
Add App Store credentials you previously copied to configure payment verification in MyTracker:
After MyTracker verify payments successfully, the icon will be displayed next to the integration condition.
All payments tracked after you add credentials will be verified on App Store servers.
If necessary, you can edit already added credentials. To do this, go to the condition row and click Edit credentials. In the form that opens, click Edit and add new App store credentials, and MyTracker will overwrite old credentials with new ones.

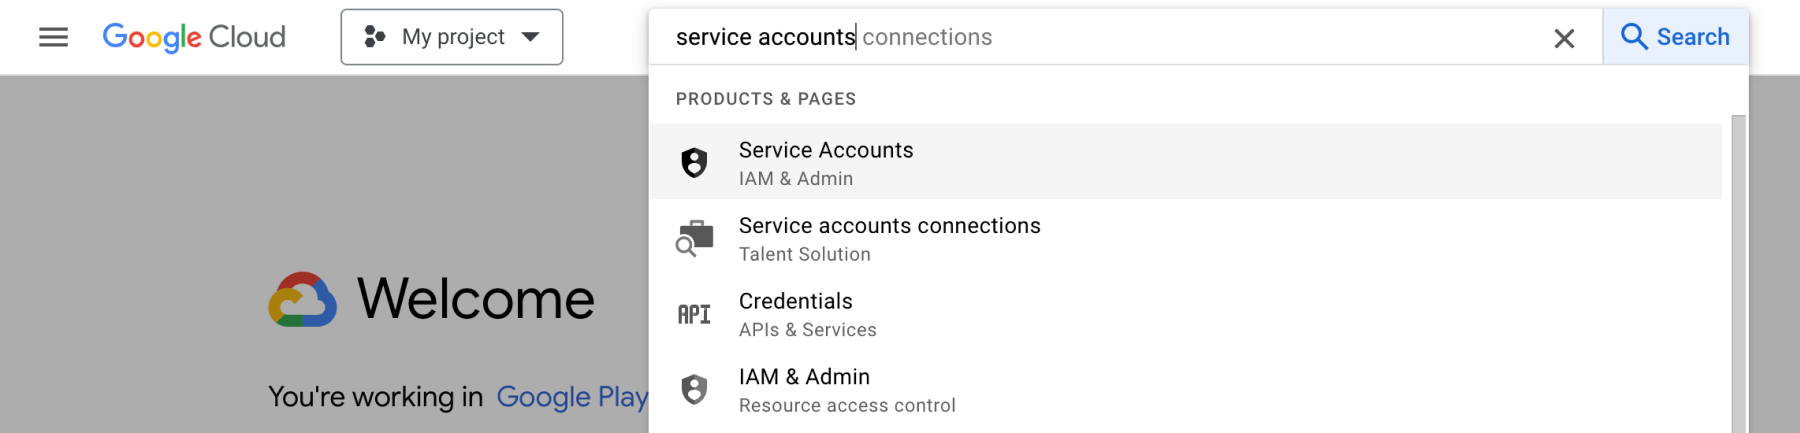
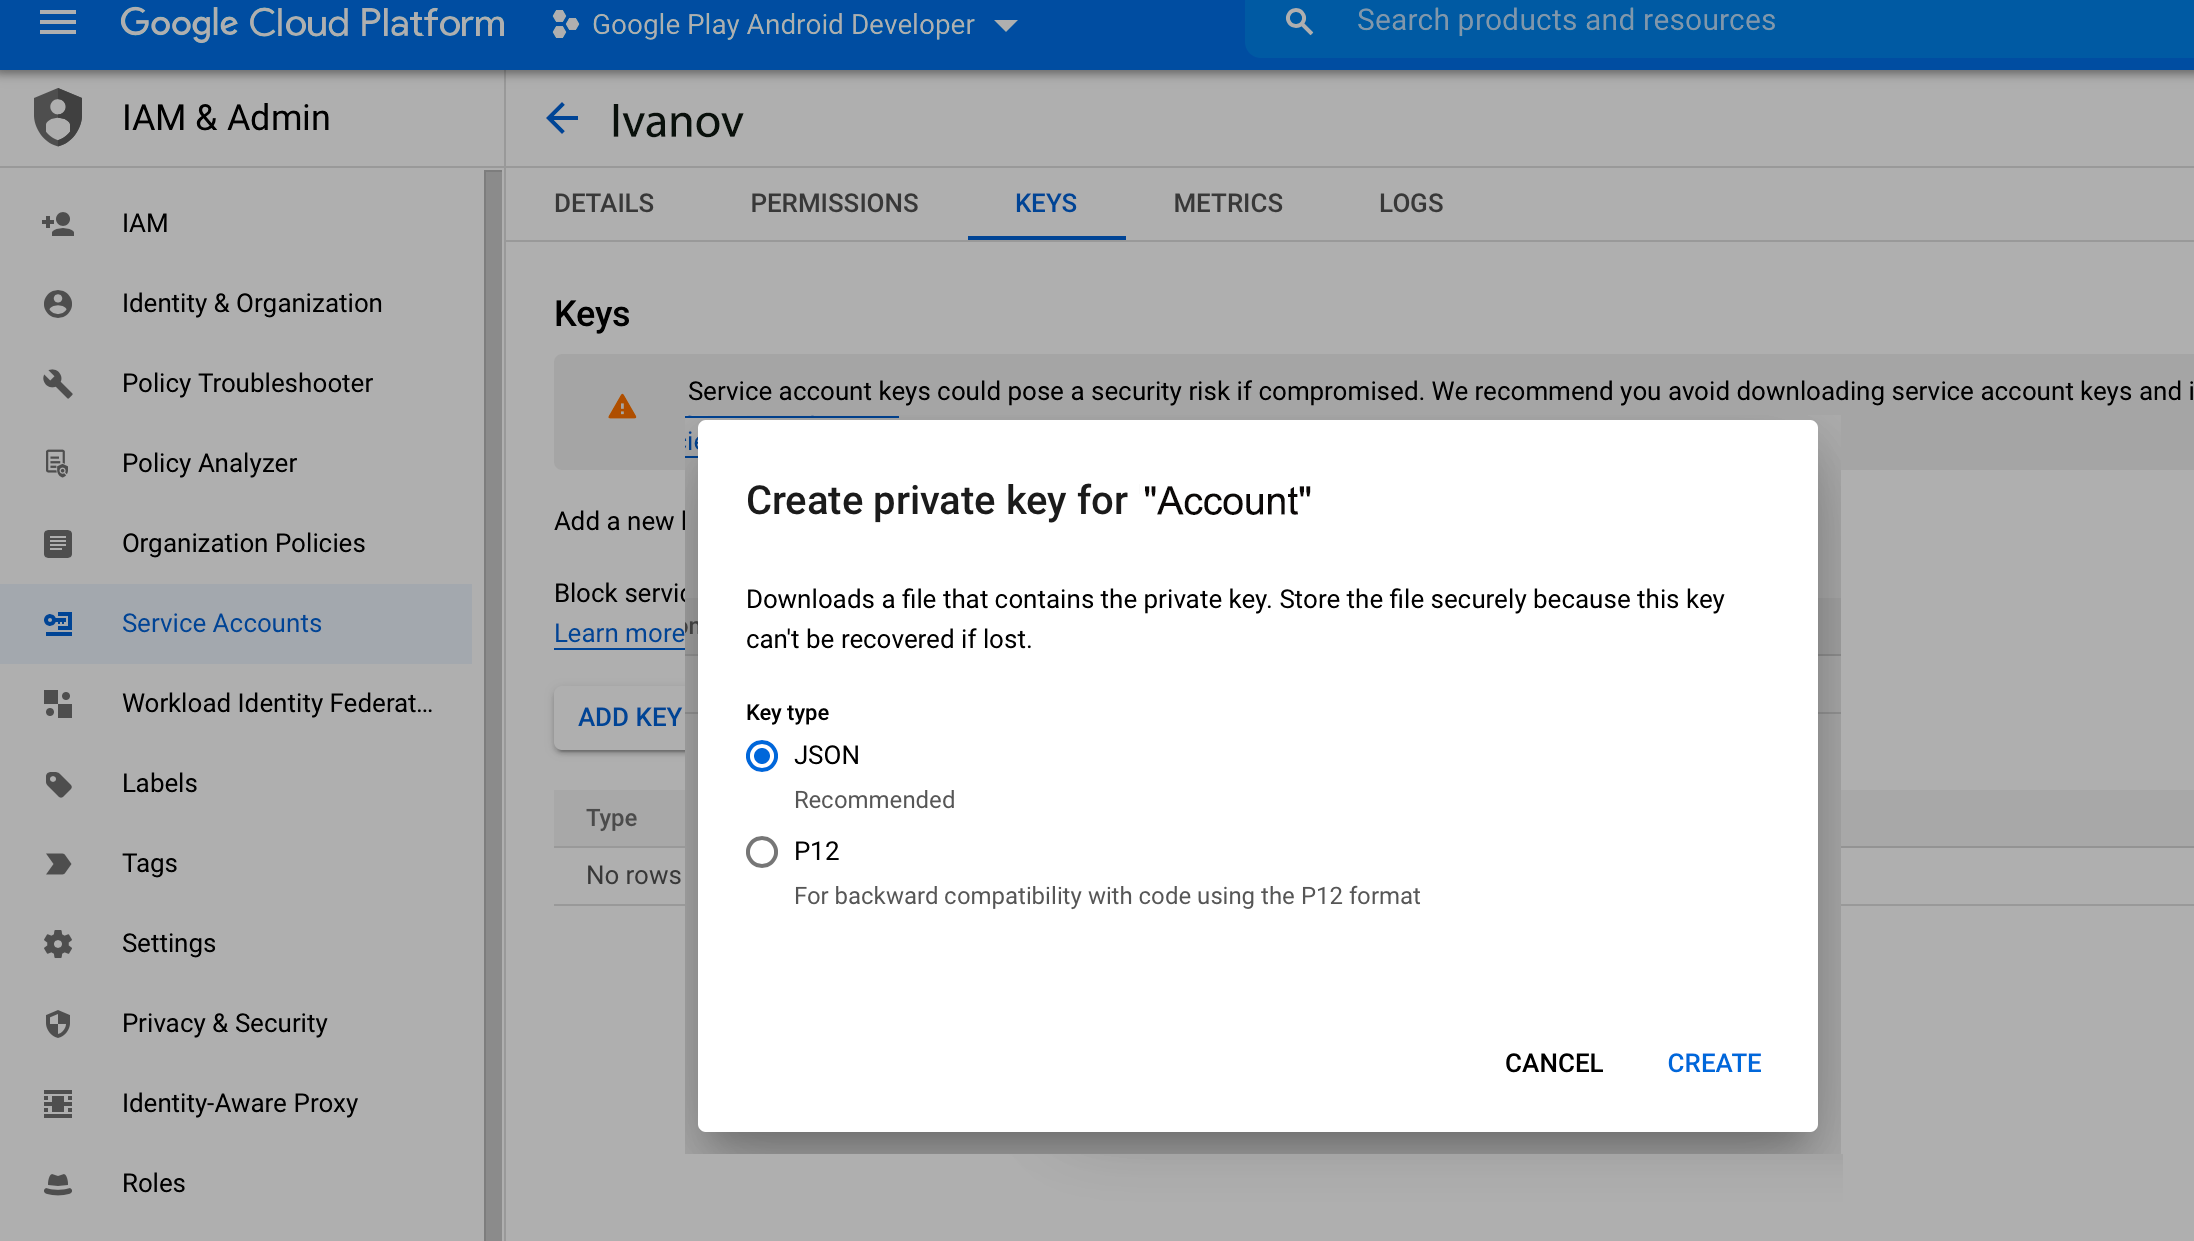
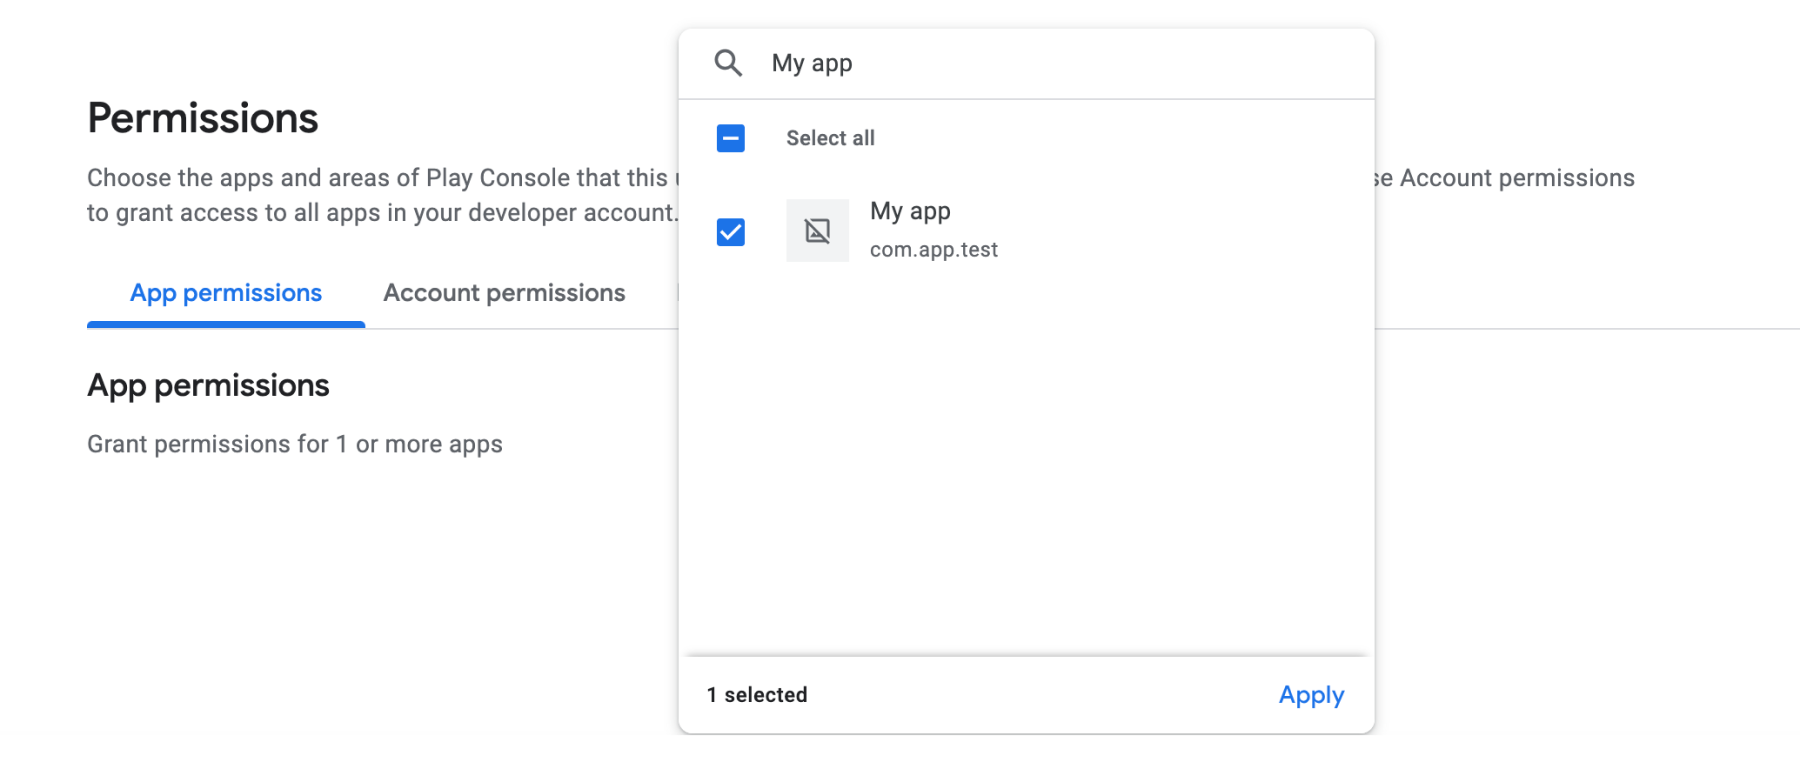
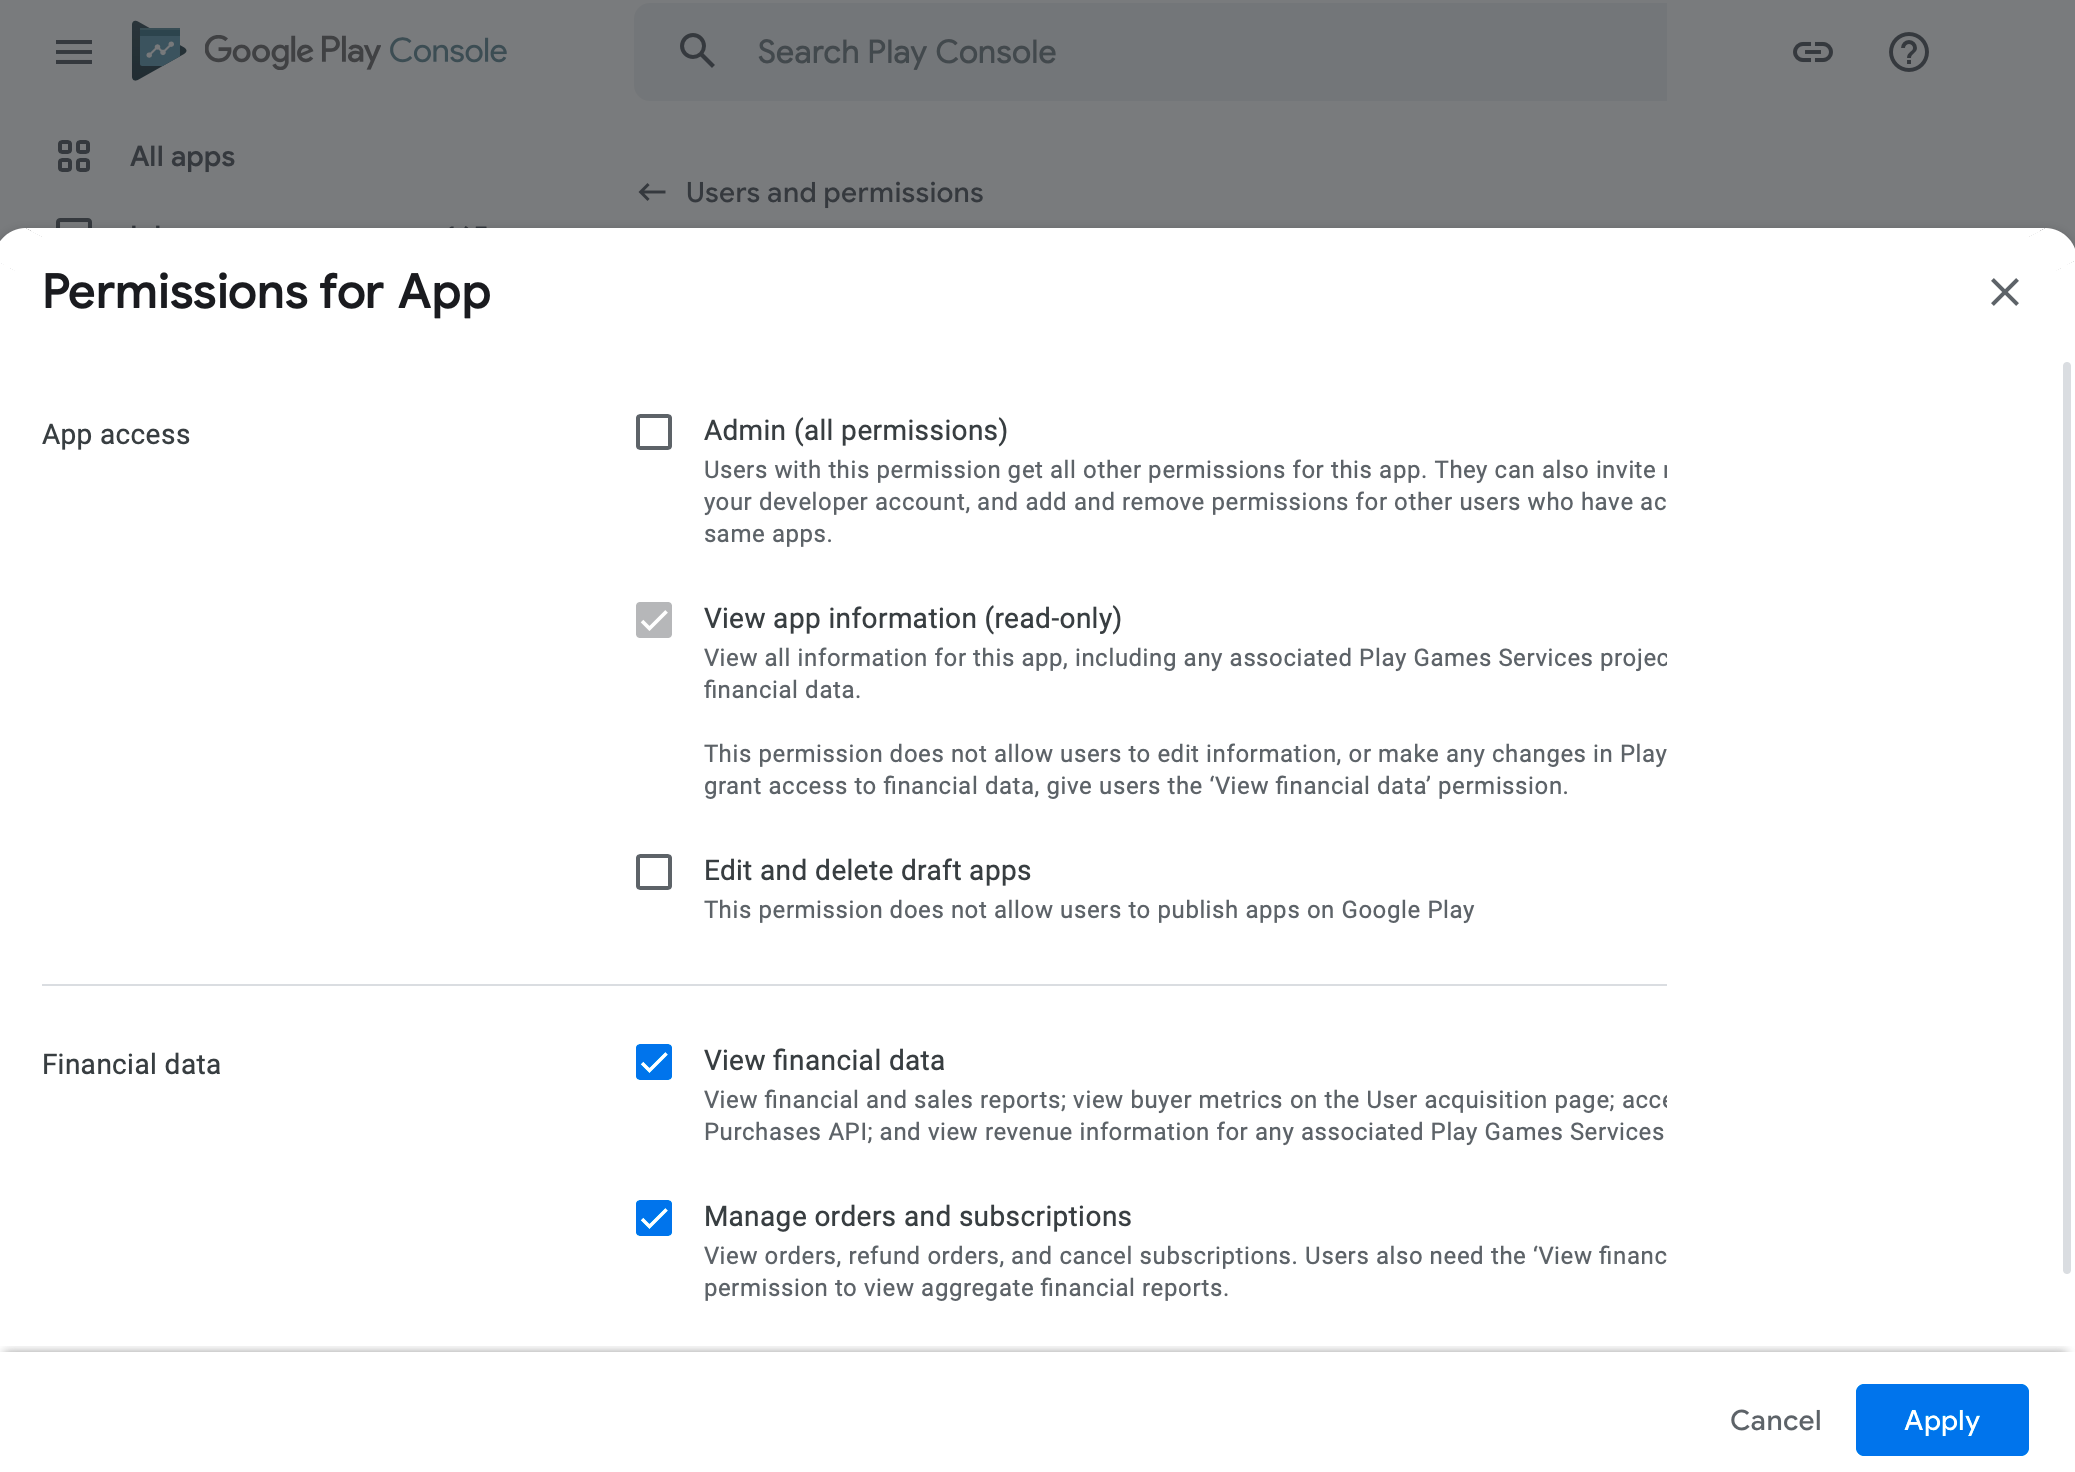
To get Google Play credentials:

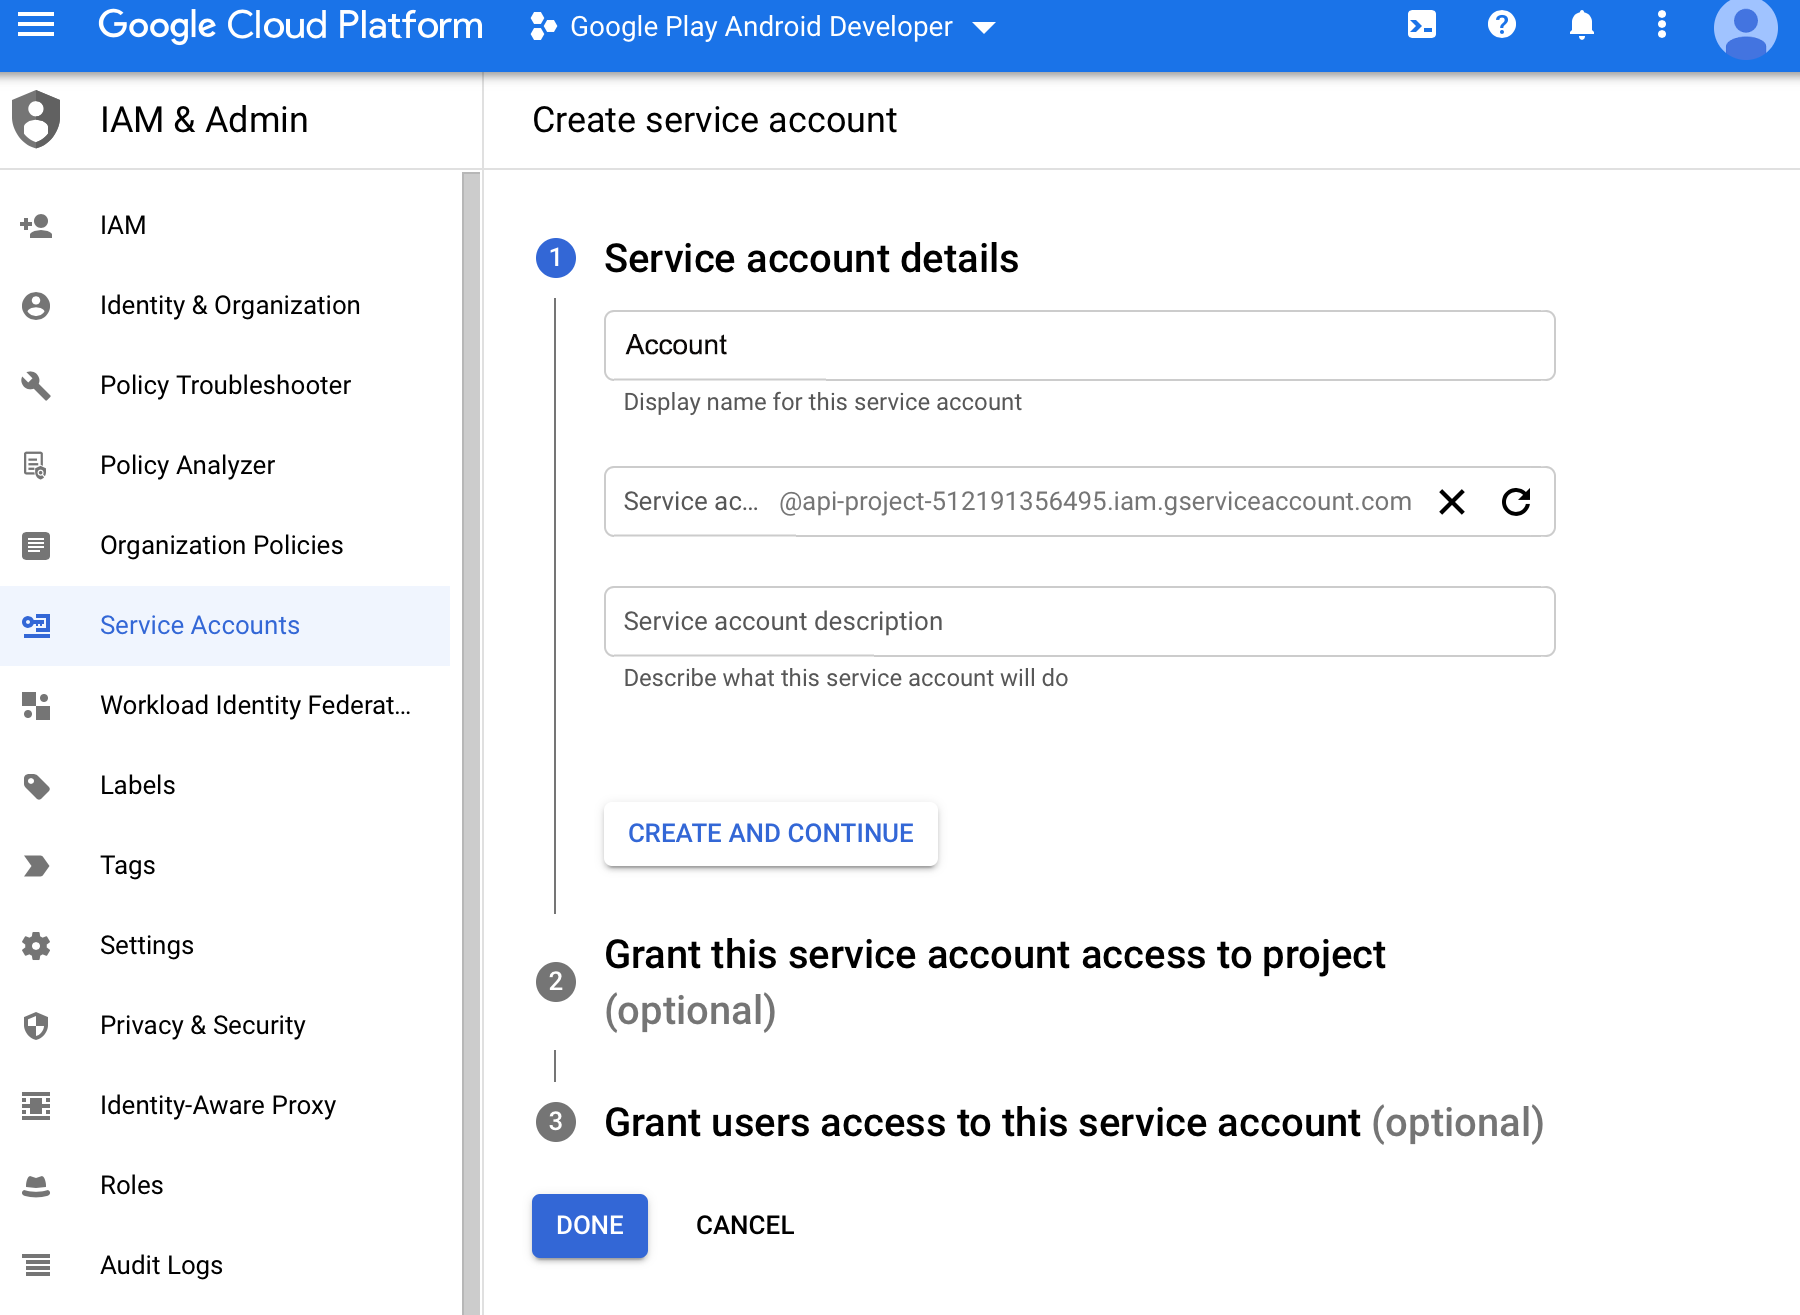
Credentials activation can take from 1 to 24 hours since you got access to payment verification
Use credentials to configure payment verification in MyTracker.
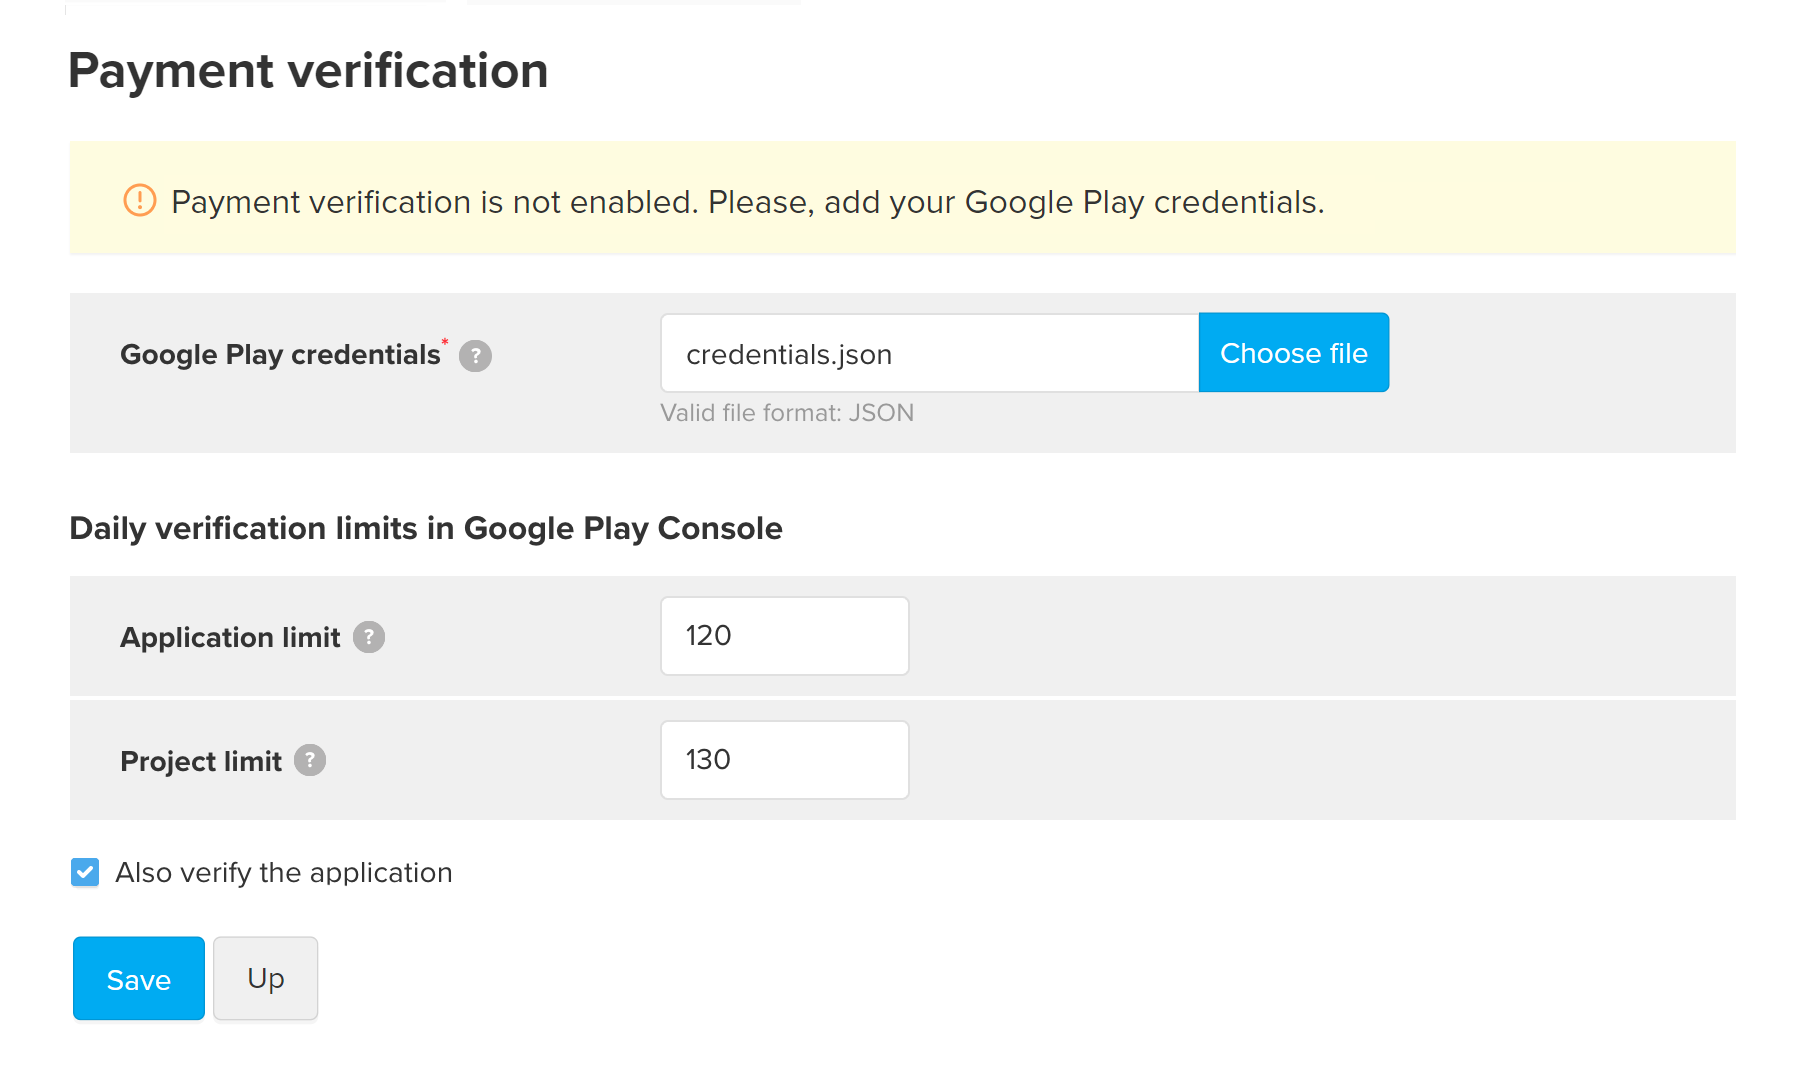
Add Google Play credentials you previously received to configure payment verification in MyTracker:
The project limit relates only to Google APIs Console projects and not applicable to MyTracker projects
After successful verification configuration, the icon will be displayed next to the integration condition.
All payments tracked after you add credentials will be verified on Google Play servers.
Google Play provides a certain number of payment verification requests. In MyTracker, you can set a daily limit for payment verifications and control their number for each MyTracker application or Google APIs Console project. Once MyTracker reaches the limit, it will delay the processing of the remaining payment verification requests until the next day.
You can submit a request to Google Play Help on the daily limits increase for the number of payment verifications for a Google APIs Console project or MyTracker application, and then, if needed, increase the request limit for MyTracker
If necessary, you can edit already added credentials. To do this, go to the condition row and click Edit credentials. In the form that opens, click Edit and upload the json file with new Google Play credentials, and MyTracker will overwrite old credentials with new ones.
The access key error
The app for which you want to verify payments cannot make a request to Google Play Developer API because of the absence of Google Play Developer Console binding. Probably this happened because of your credentials, that is why you need to update them.
The Google PLay Console permissions error
Probably you have insufficient rights to make requests in Google Developer API. Make sure that you configured the necessary permissions in Google Play Console > Settings > API Access > Service Accounts and waited 24 hours after that. Or you can edit the app in Google PLay Console to perform permissions' forced update.
What will happen with incoming payments while the error is not fixed?
MyTracker will record payments as unverified. As soon as you update credentials or get verification permissions, all unverified payments will be automatically verified.
To build the report on unverified payments with the Builder , use the Financial dimensions → Verification metric and the Other filters → Financial metrics → Verification → Unverified filter.