An account is a way to form joint access to marketing activities and app stats. Within one account you can add multiple projects and apps, form joint access for users, create and manage ad campaigns.
Do not confuse an account with the MyTracker profile. The Profile is a login and password to access the MyTracker platform. One user can be connected to more than one account, while multiple users can act within the same account
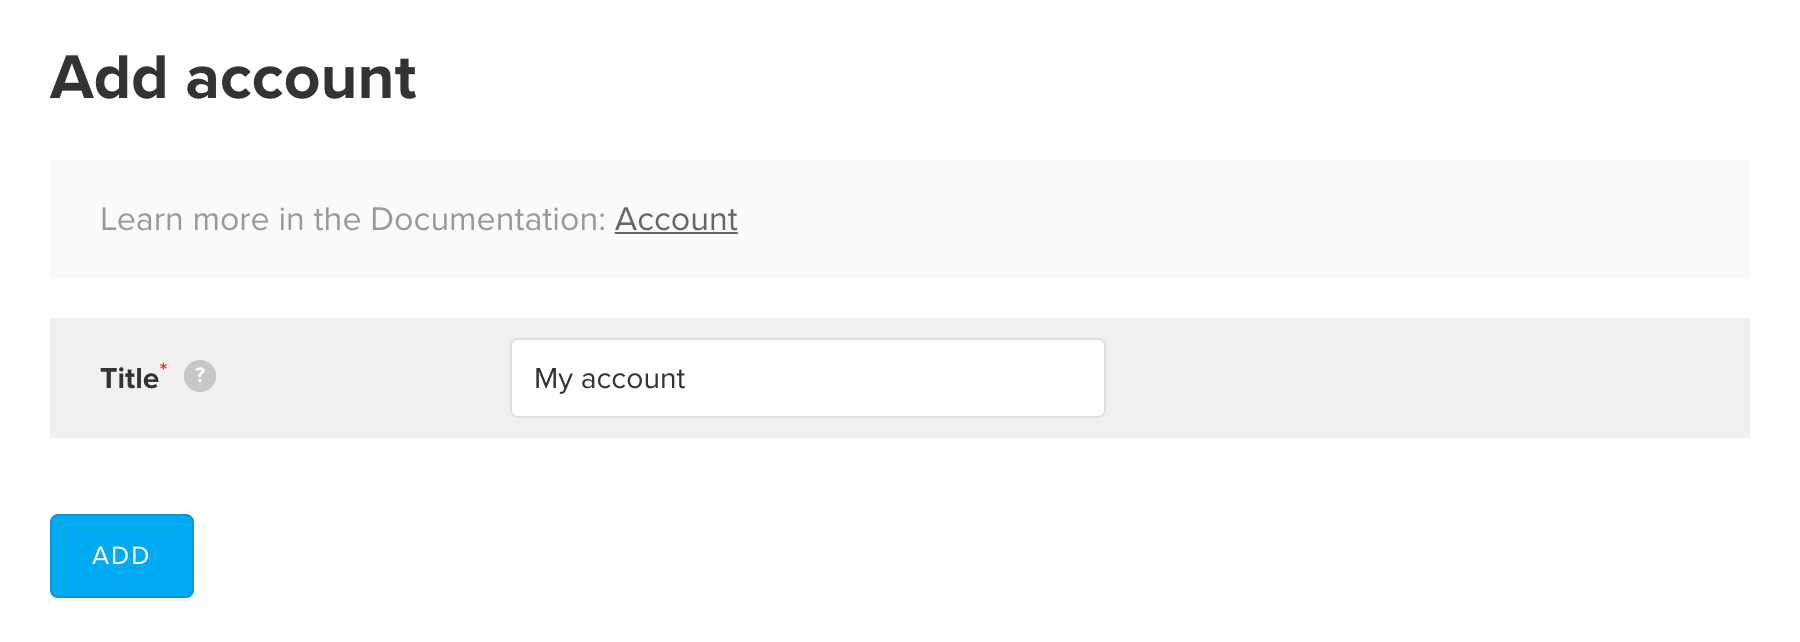
Go to adding project after your account was created. It's handy to set multiple applications at one project (for example, the same app at different app stores).
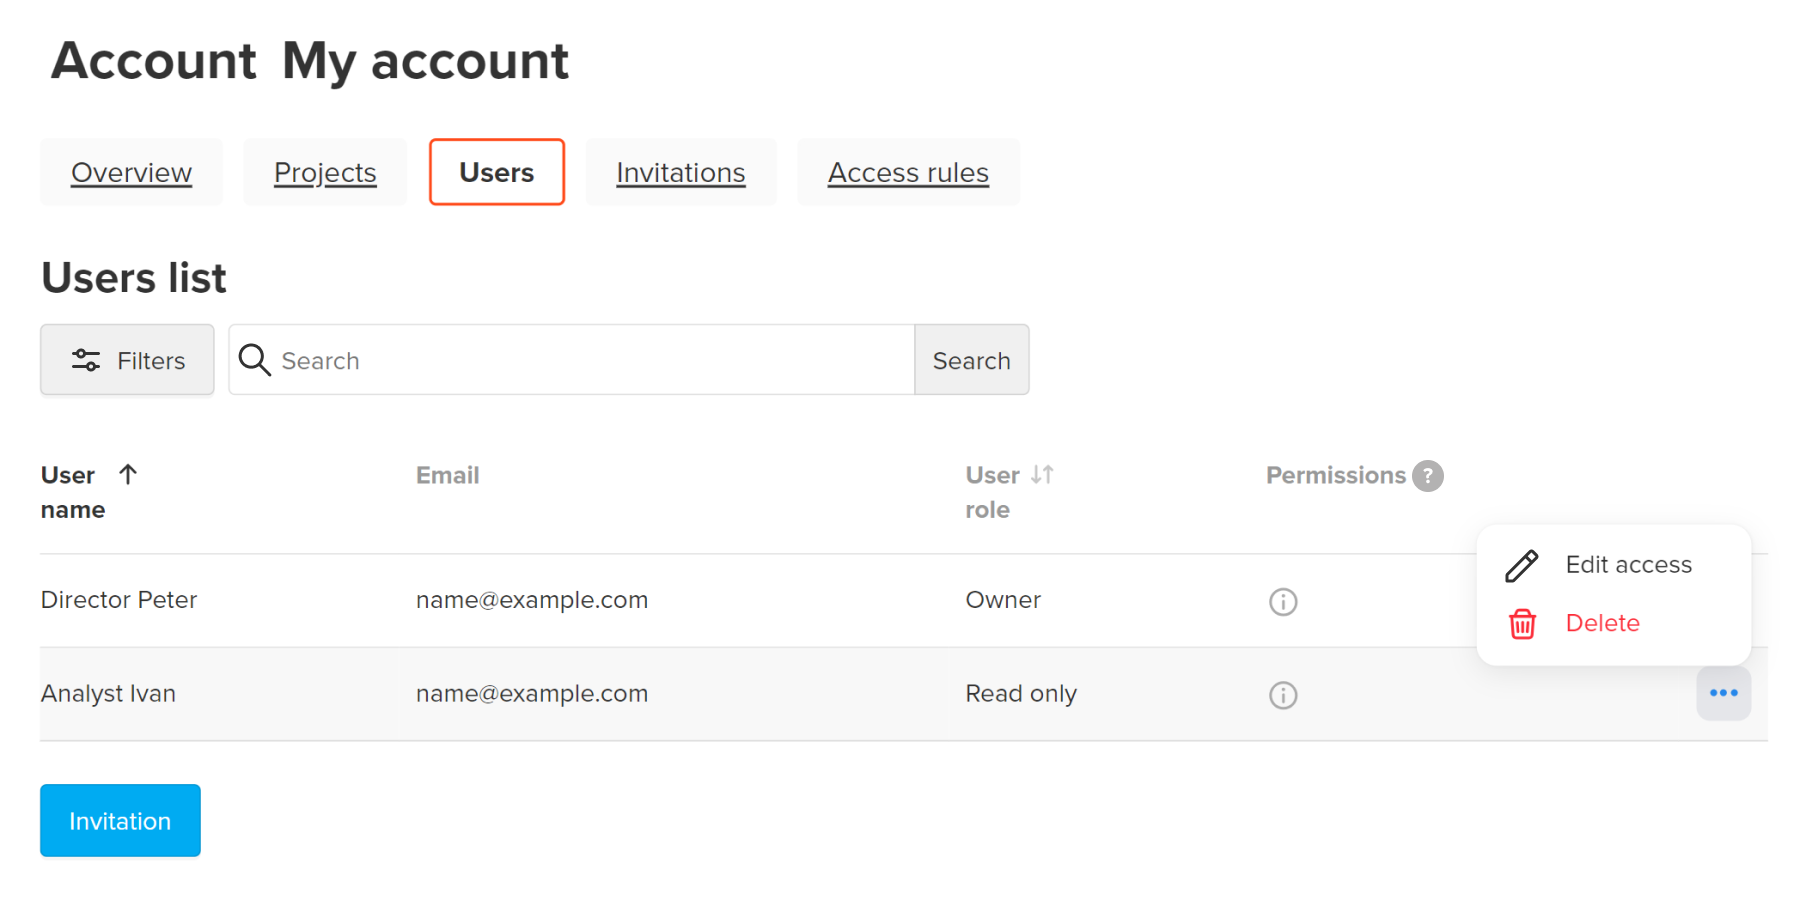
Invite users and assign different roles to the users of your account. For example, to your team members: give the marketer the ability to manage ad campaigns and the analyst to generate reports on the collected data.
The user's access to certain features of MyTracker is determined by their role in each of the accounts:
At the same time, different roles can be defined in different accounts. For example, a user can be granted with access to two accounts, with Owner role in the first one and Read Only in the second. In this case, the user will not be able to start campaigns or change the settings of the second account, but will have full access to the first.
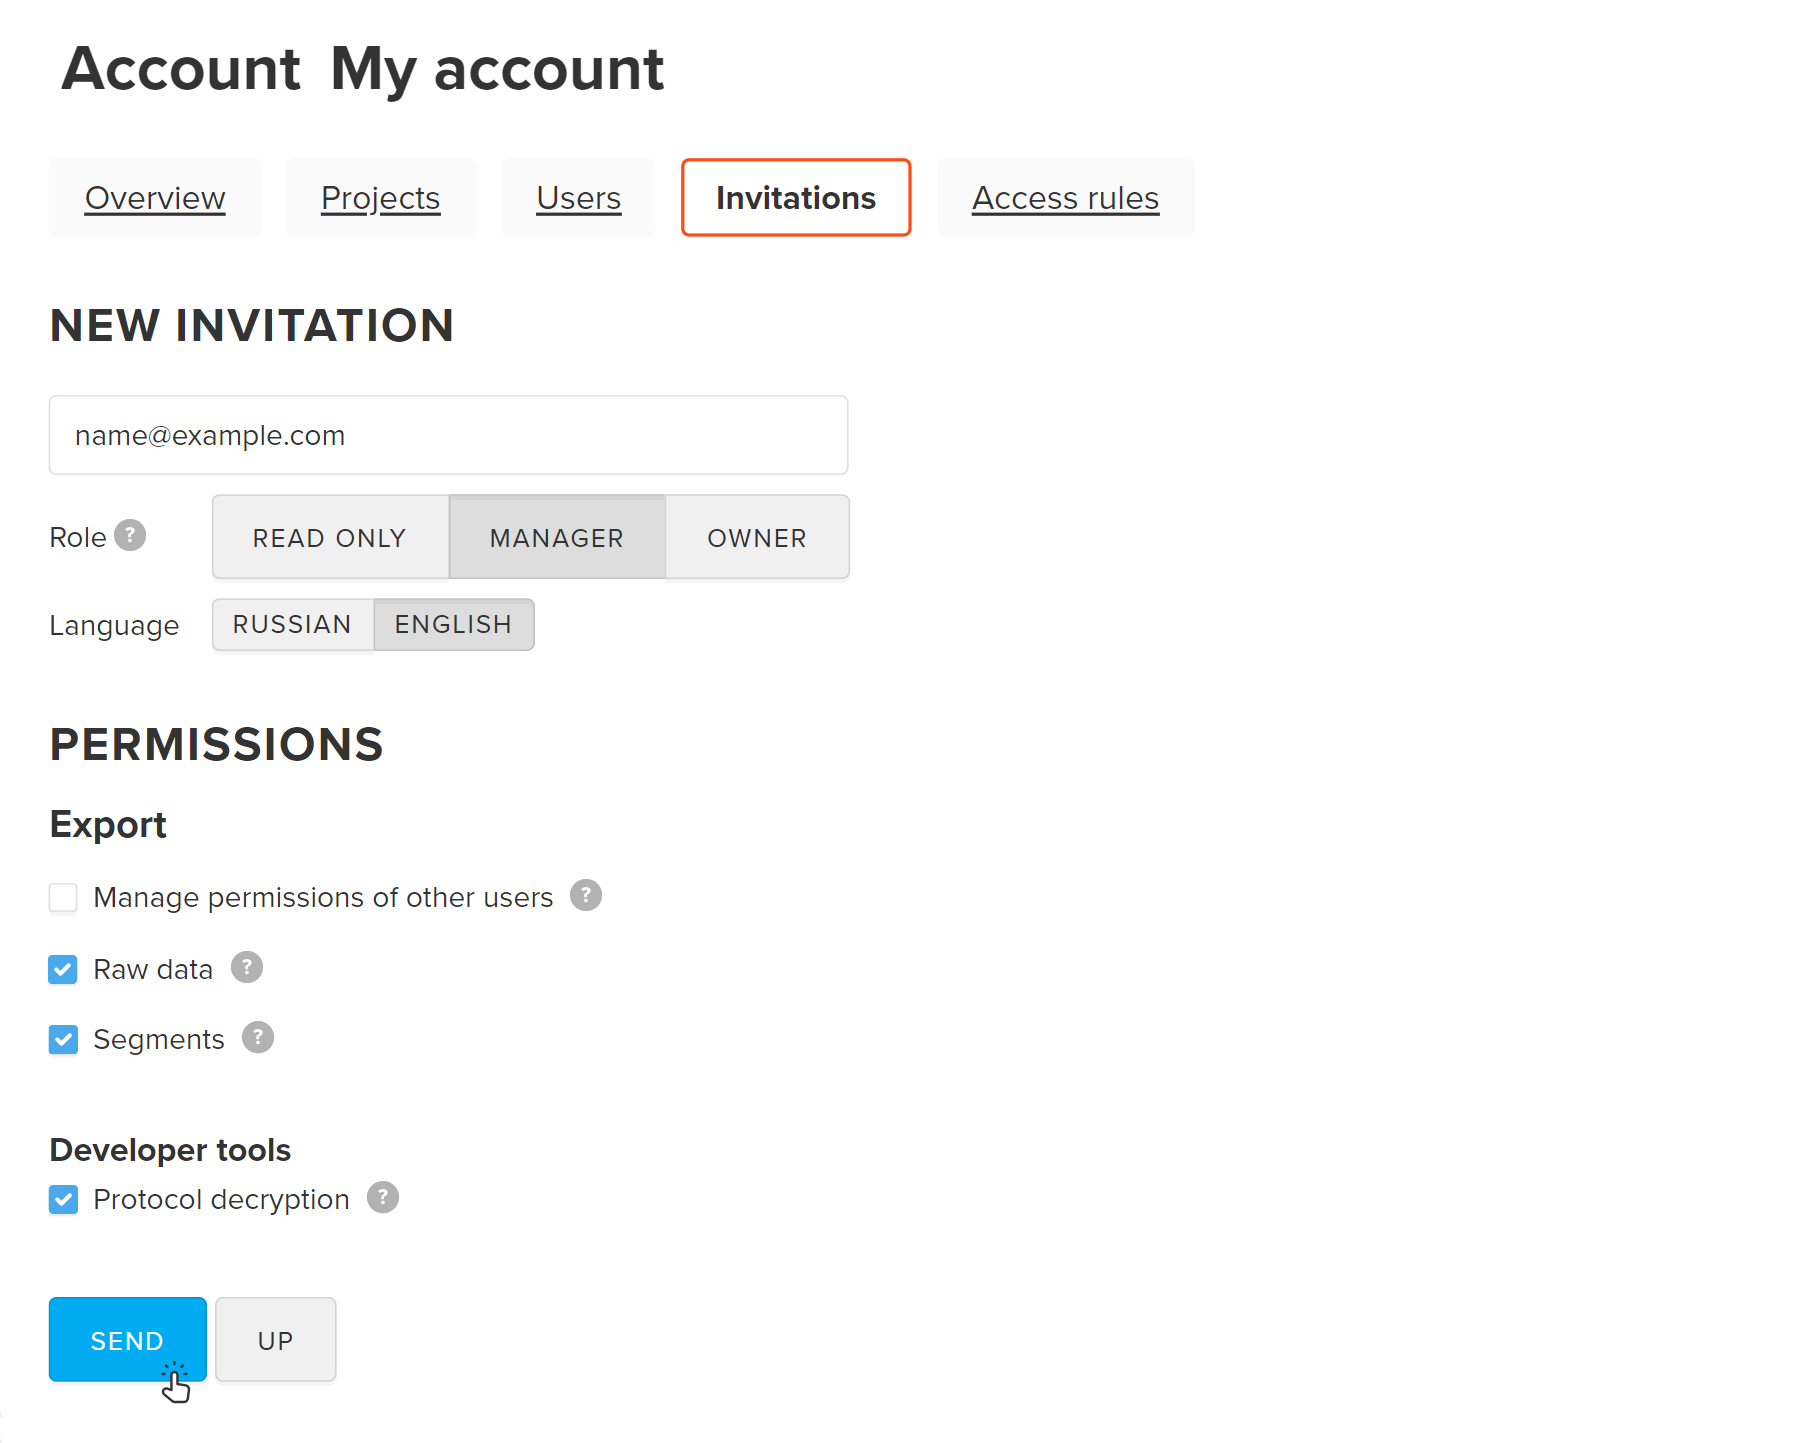
You can also control user access to some tools in MyTracker. There are following permissions for this:
Export dataOnly the account owner has access to view and edit permission to protocol decryption
Account owners and managers can send an invitation to a new user. But managers can only select a role in the invitation. To edit permissions they must have the Manage permissions of other users permission.
Role and permissions, granted to the account, are valid for all projects and applications in this account
The user will receive an email with a private link to the account. As they follow the link, they will be assigned with the granted roles and permissions. New users will be requested to register in MyTracker first.
The registered user will see the invitation in the accounts list and will be able to accept or decline it.
Invitations may be in the following statuses:
Account owners and managers can edit permissions as long as they have the Manage permissions of other users permission
Create a new invitation with the same permissions and role by duplicating. Account owners and managers can duplicate the invitation.
Only invitations that have been used or have expired can be duplicated
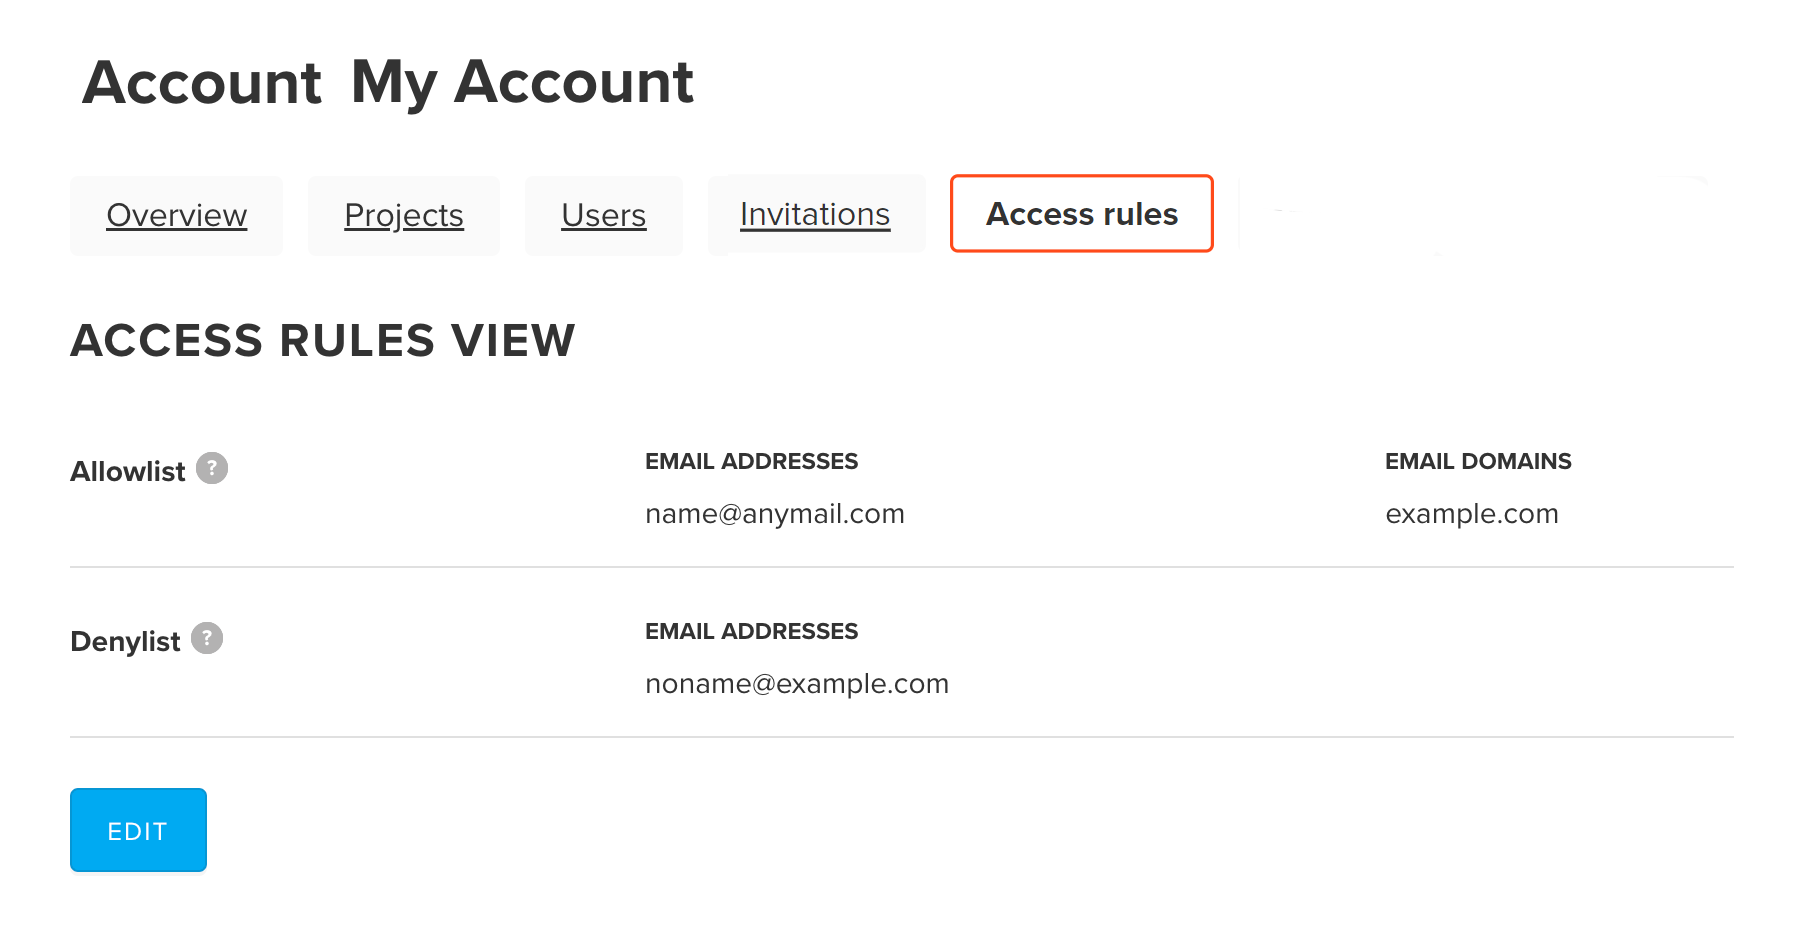
You can list allowed and denied email addresses and domains and be sure that all account invitations will be accepted only by the users, whose login accounts meet MyTracker account access rules.
Only account owners can edit access rules
Denylist configuration is prioritized over allowlist that means if you add email domain to allowlist and email address with this domain to denylist, MyTracker considers this email address as blocked, and a user can not accept the invitation to the account.
To add more fields, click +email or +domain if needed.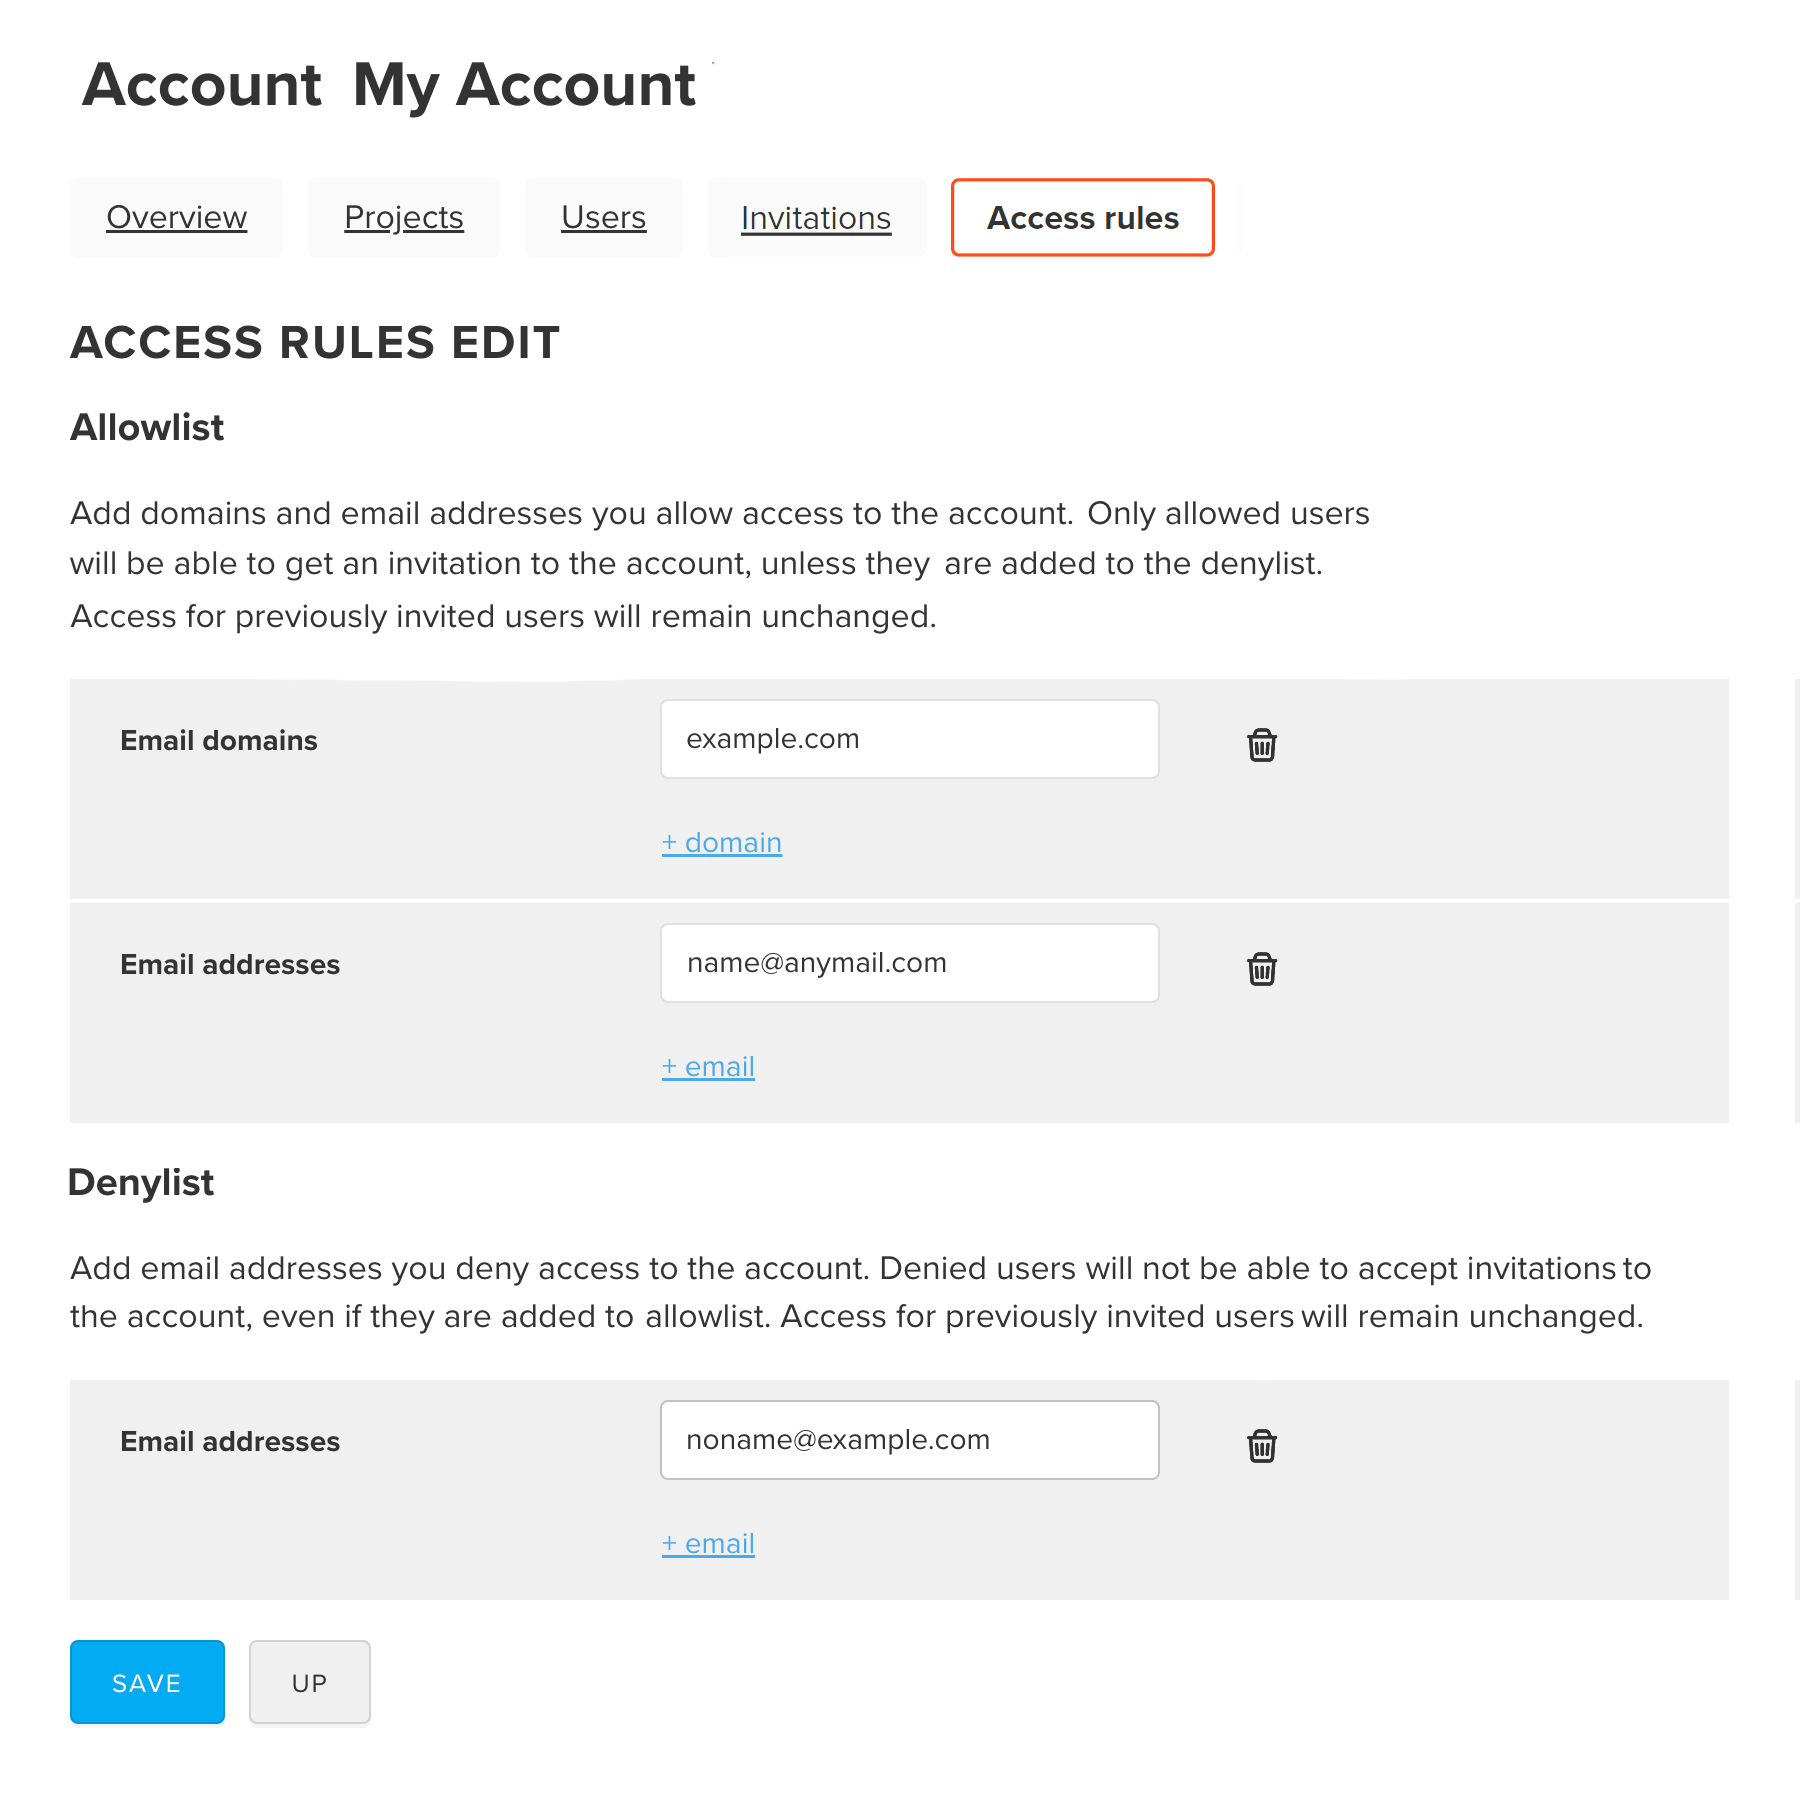
The user with the denied email addresses cannot access an account — the possibility to send account invitations and accept them will be disabled.
If you configure account access rules after users accepted invitations to an account, MyTracker checks allowlist and denylist and, in case the users’ email addresses are detected in denylist, marks these users with the icon. But the users will still have access to an account.
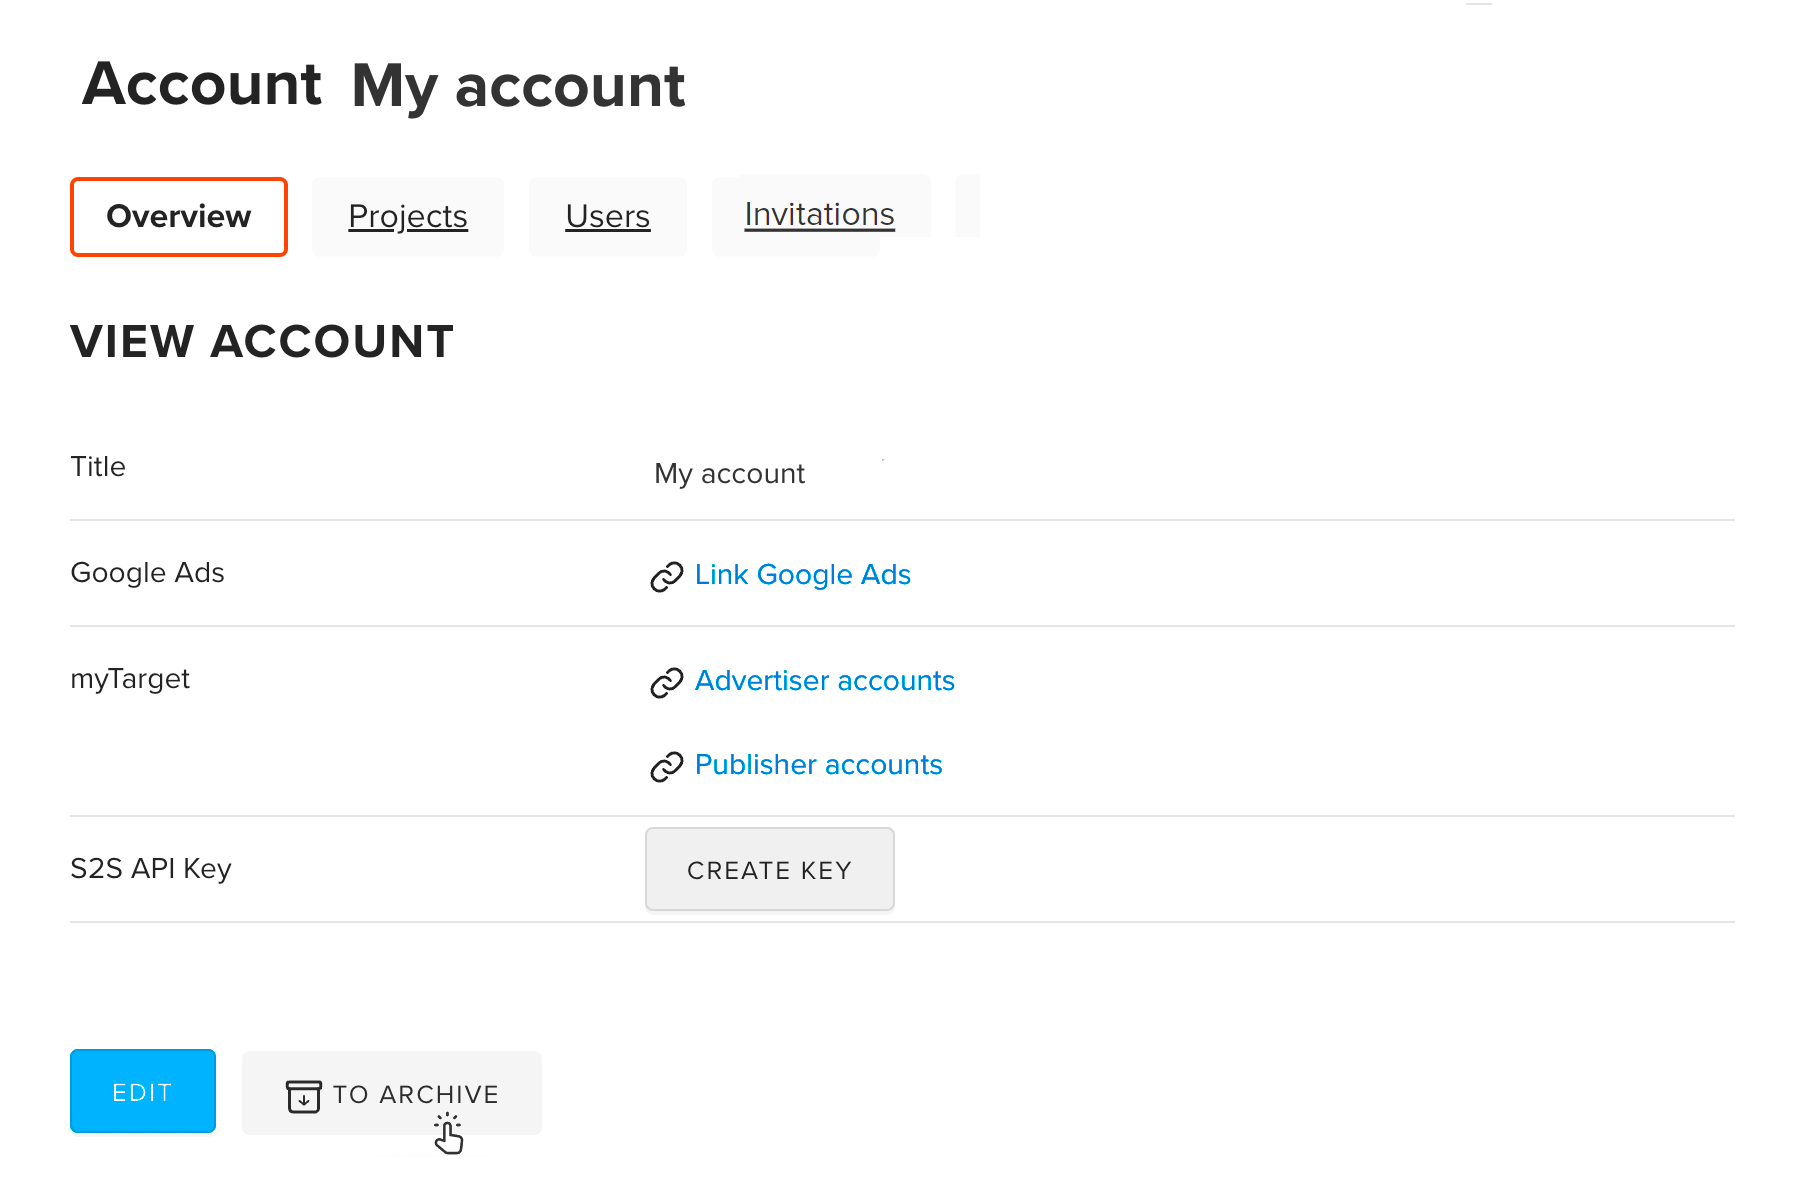
In MyTracker, you can archive inactive or erroneously created accounts. This makes the work with large accounts lists easier. The archived accounts are assigned the Archived status and are removed from all MyTracker lists.
To move an account to the archive, click To archive on the view account page. Applications and projects related to the account will not be archived. If necessary, you can display the archived accounts by turning on the Show archived toggle and continue working with them.
To restore an account from the archive, click Restore on the View account page. The account will be displayed again in all MyTracker lists.
MyTracker automatically archives accounts, which were created more than 3 months ago and contains no apps or only apps created more than 3 months ago.